
Network performance and reliability are the foundation of a robust and sound communication system. Therefore, to ensure a successful connection between the computers and the data center, network technicians need the right assistance tools, punch down tool among which, is extremely essential for the smooth networks running. So, in this article, we will offer you some tips on how to use punch down tool effectively.
Punch Down Tool Description
Also referred to as krone tool, the punch down tool is a small hand tool most often used by telecom and data network technicians to install wiring for telephone, computer and various audio networks. This tool allows for the quick and effective cross-connection of wires through the use of 66-type or 110-type connection blocks.
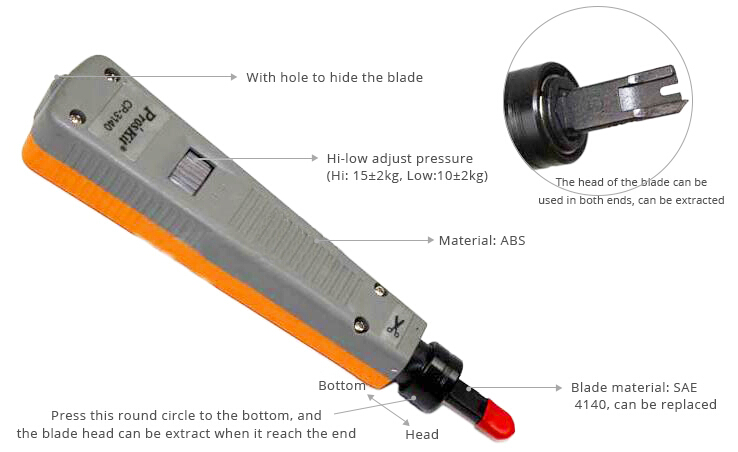
Punch down tool is commonly used for the termination works in the copper network. It is used to terminate the Ethernet cables (Cat5/5e/6/6a) by inserting the cables wires into the insulation-displacement connectors (IDC) on the punch down blocks, patch panels, keystone modules, and the surface mount of boxes. The name is thus derived from the method by which the tool pushes a solid copper wire between metal blades on the connection block, and cuts off the excess by punching the tool, driving the tool blade through the wire.
How to Use Punch Down Tool
When there comes the need to repair or install cables, you’ll inevitably need to cut and secure wires. However, exposed wiring can be dangerous and may cause your connections to short out. Punch down tool thus is necessary to ensure that your wires are secure, and meanwhile to help trim and contain the wires in a basic jack. Then how to use the punch down tool? Here we offer you a guide for reference.
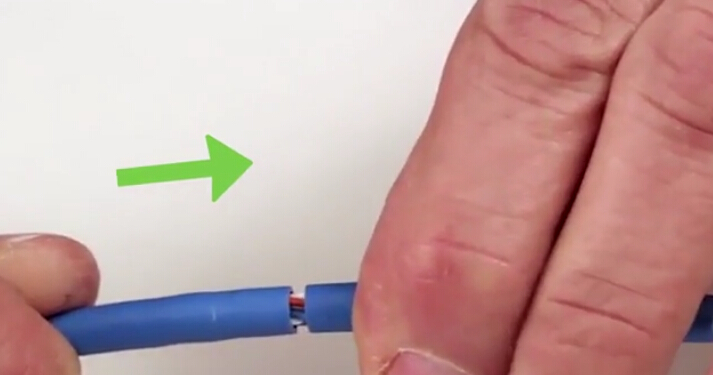
What should be noticed is that always leave about 2.5 inches (6 cm) at the end of the cable. Insert the cable into the cable stripping tool or modular crimping tool, and spin it around a few times. Then remove the jacket. Stripping back the cable will help you remove the jacket to expose enough of the cable, so you can separate it.
After removing the cable jacket, you will have a few inches of exposed cable. Then gently pull away from the wire pairs from the center of the cable so they fan out. Separate the wire pairs by twisting in a counterclockwise motion. Try to straighten the ends as much as you can, and this can make them easier to terminate.

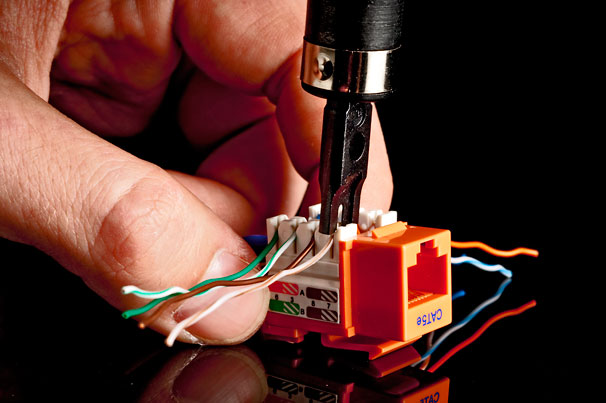
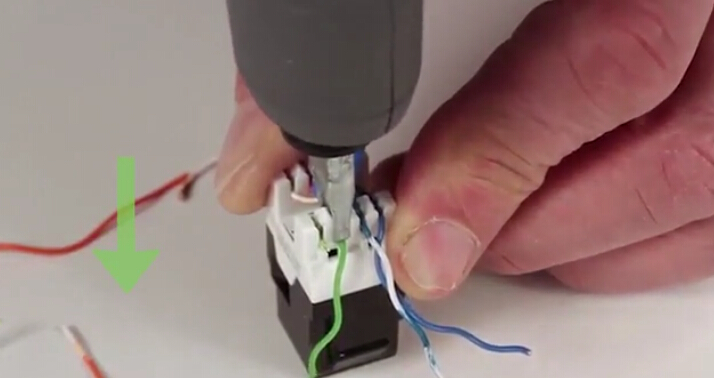
Take the protective cover off the top of the jack and set the cable into the block of the jack. Insert each wire into its own separate slot, making sure that the wire matches the A or B configuration. The conductor wires should be extending out of the jack.
Note: Consider to choose between T568A or T568B wiring scheme. The T568B is becoming more popular since it can be used with older color codes as well as newer codes.
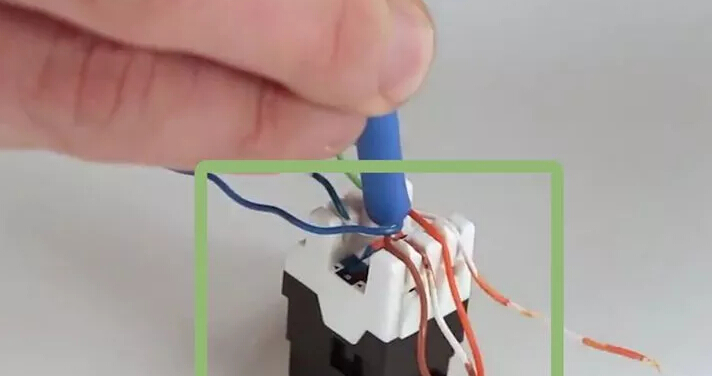
Take your punch down tool and press it down on the conductor wires to cut them. The angled (cut) part of the blade should contact with the long sturdy side of the jack. This will also make sure the wires that are cut are flush with the jack.
Note
- Be sure to punch straight down and not at an angle. This will prevent the jack from bending.
- A loud click along with the punch down action means that you’ve terminated the wire correctly.
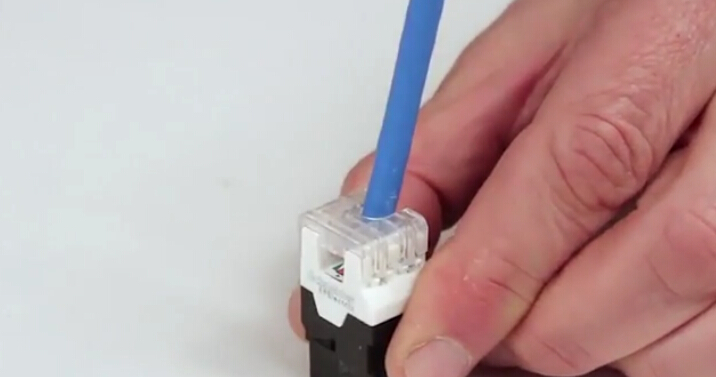
Look at each wire to make sure there is no overhang out the side of the jack. You should also make sure that the edge of the cable jacket is near the base of the jack and the wires you just terminated. The wires should be securely in place. If you notice wires sticking out the side, take a wire cutter and carefully trim the wire so that it’s flush with the jack.

Snap the dust caps in place to protect the wires. This will keep the connection secure and can prevent strain on the wires. The dust cap is also very easy to remove: simply pop off the dust cap using a flat-head screwdriver inserted into the indentation on the side.
Note: Fail to set the dust caps back on the jack indicates that your wires may not be seated correctly. It is better to check the wires again and make sure they are secure and trim.
Conclusion
This article detailedly shows you how to use punch down tool. Punch down tool is an easy-to-use and convenient network instruments that help ease the difficulty of termination job. It also efficiently contributes to reducing termination time. FS.COM offers a wide range of punch down tools of top-notch quality and with reasonable price. For more information, visit www.fs.com.


