
Network Patch Panels are intensively used in the Ethernet cabling installation, and they are generally regarded as a critical component in the entire cabling systems. Serving as the nerve center of the cabling network, the importance of patch panels cannot be neglected. Among the different forms of patch panels, feed-through patch panels are less messy than traditional punch down patch panels, offering an ideal alternative to existing data centers that require additional patching.
Feed-Through patch panel is an in-line series of connections mounted onto a frame, which enables network cables to be terminated in an orderly manner. The numbering of the panel ports allows for the network installer to label the wall plates to match the corresponding connection at the patch panel. Feed-through patch panels are the ideal way to create a standards-based, flexible, and reliable copper platform in your data center. Available with 1U (24 ports) and 2U (48 ports) configuration, feed-through patch panels are the perfect complement to further facilitate your ease of installation and maintenance, as well as optimal flow of information. Cat5e and Cat6 feed-through patch panels are commonly used in data centers nowadays.
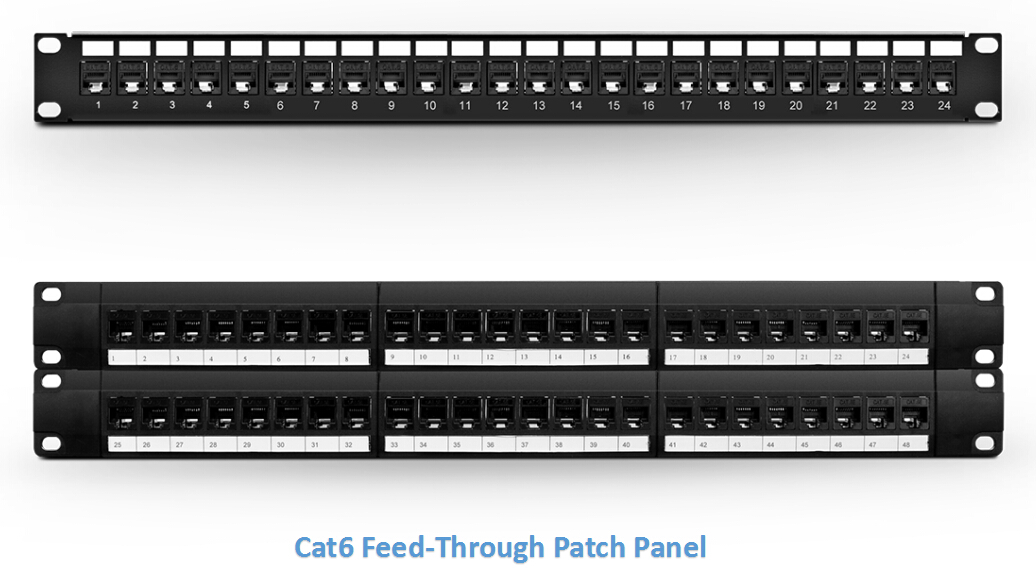
The feed-through patch panels have RJ45 ports on both sides for easy installation, and each panel accommodates 24 ports in 1 rack unit. The panels are available in Category 5e, Category 6 and Category 6A configurations. General features of feed-through patch panels are listed as follows.
- Simple solution for managing cables patching in high-density IT environments
- Loaded with feed-through adapters, providing quick and easy connectivity
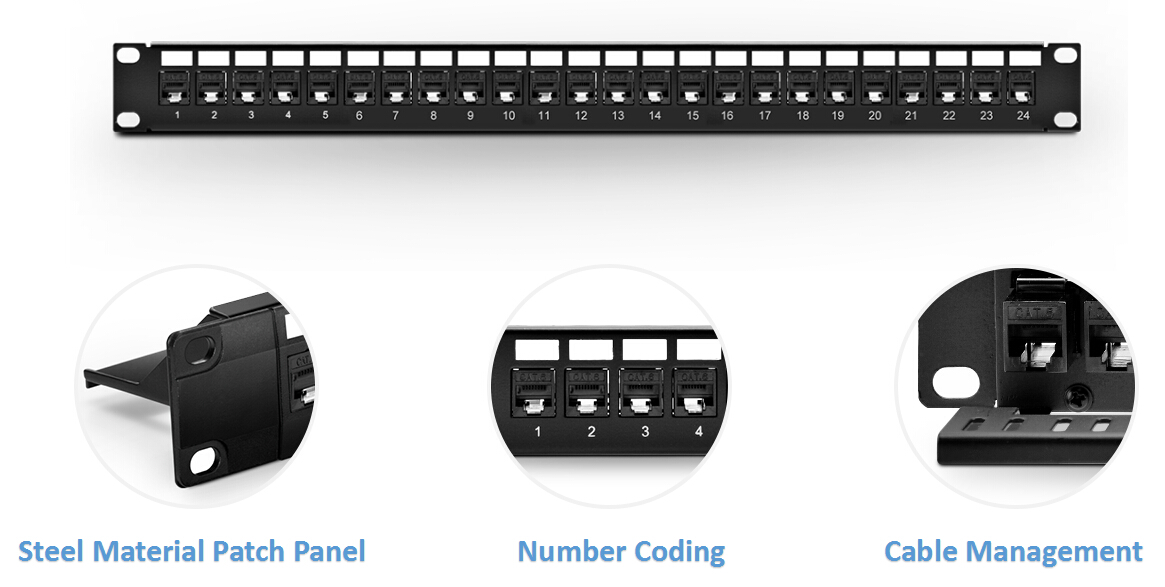
- Numbered and labeled ports for easy identification and reference
- With universal 19-inch rail spacing, sturdy metal construction
- Without punching down the wires to the ports, it saves time and energy while maximize productivity
- Perfect for voice and data transmission up to 10 Gbps.
Use the feed-through patch panel in relay racks or communication cabinets. They neatly organize and support the data cables you’ve installed in the rear of the patch panel. Follow these steps to install the feed-through patch panels.
Step One: Find an empty rack space.
Step Two: Install the panel with the supplied 10-32 or 12-24 cup head screws.
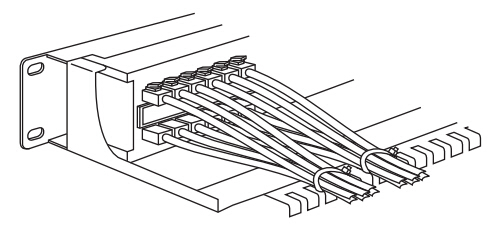
Step Three: Install the RJ-45 patch cables on the front and rear connectors. Make sure the rear patch cables are resting on the cable management bar.
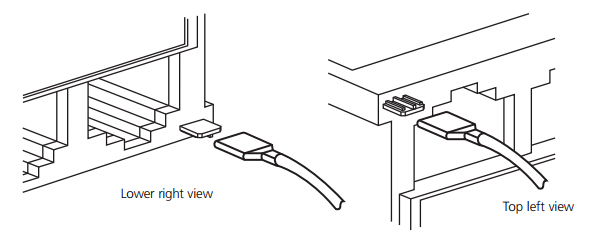
Step Four: When using the shielded feed-through patch panels, make sure to attach the necessary drain wires. Use one drain wire for each shielded module on the patch panel. Attach the drain wire in either of the two places as shown in the following picture. Connect the other end of the drain wire to proper ground. The following picture shows drain wire installation options for shielded models.
Step Five: Use cable ties to secure the cables to the cable management bar. The figure of a completed installation is shown below.
Feed-through patch panels enabling patching without punching down bulk wire to the back of the panel, and keeping patch cables neat and tidy on the rear of the panel. Moreover, feed-through patch panels also deliver excellent performance and facilitate quick and easy installations. Which makes them optimum especially for high-density data center environment, as well as for Gigabit Ethernet applications.


